Download PDF
Aquarino KH — User Manual · Printed from manual.aquarino.com.br/en/kh/4-the-ph-probe-installation-and-calibration/
The pH probe: installation and calibration
4.1 Installing the pH probe
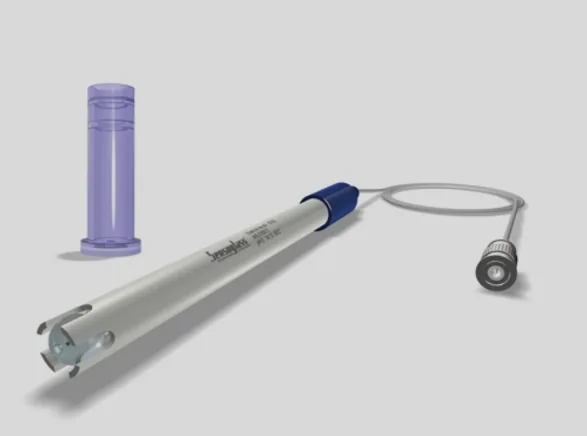
The pH probe is delicate and needs careful handling. Set aside a few minutes and follow the steps calmly.
- Remove the silicone protective cap from the probe only when you are about to calibrate, and rinse the tip in a cup of drinking water.
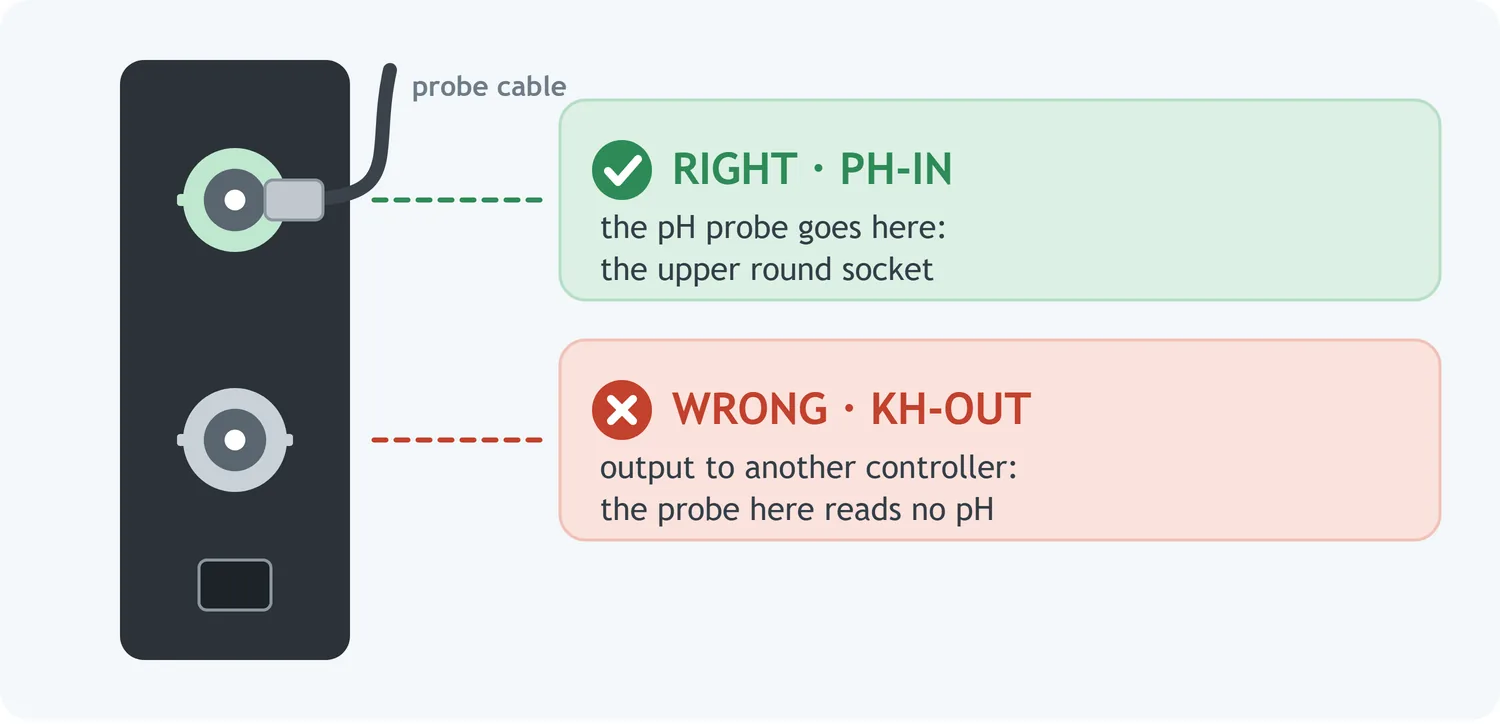
- Connect the probe's BNC to the side input marked PH-IN.
- On first installation, calibrate the probe before placing it in the compartment (section 4.2). The equipment arrives empty, which is the right condition for calibrating.
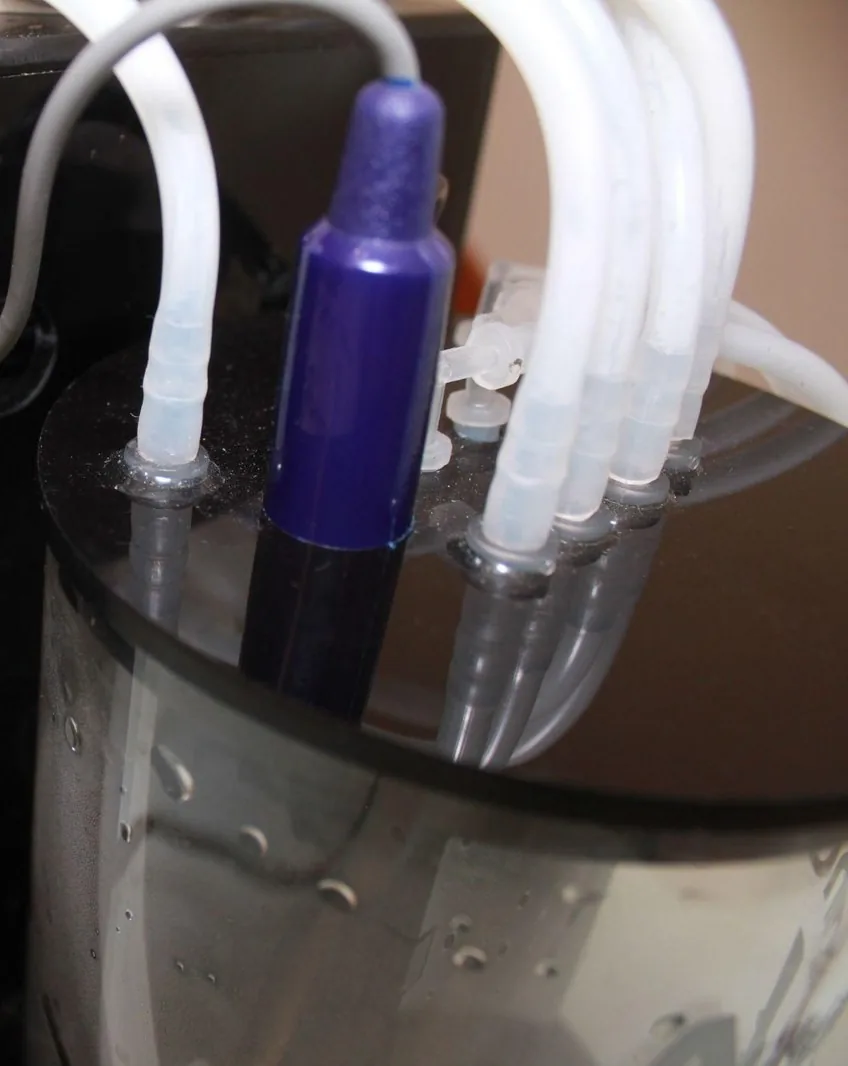
- Once it is calibrated, carefully insert the probe into the measurement compartment of the Aquarino KH.
4.2 Two-point calibration
This screen brings together everything about the probe: the current reading, the health index, the installation date, probe care and the calibration wizard. You reach it through Configuration → pH Probe.
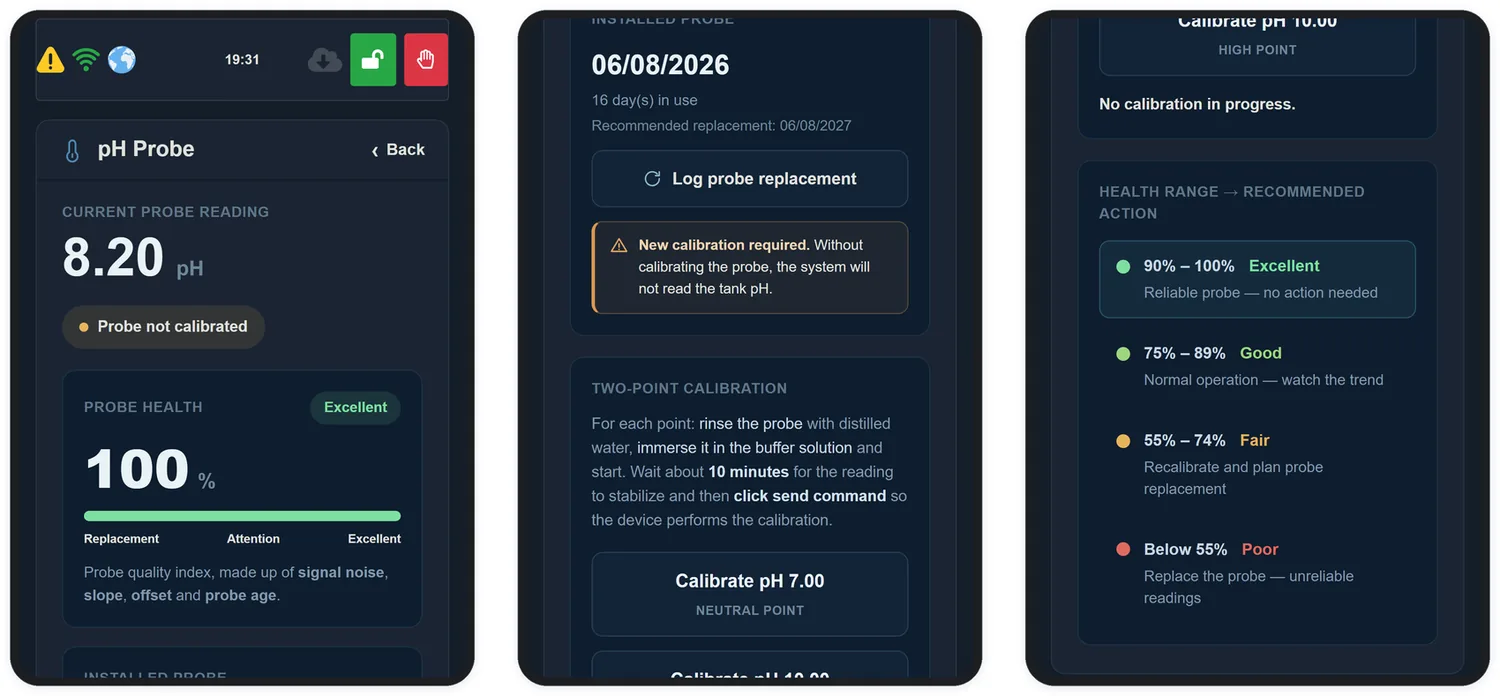
Probe calibration is what lets the equipment display the real pH of your aquarium. It is not required in order to measure KH — see section 25.3.
Tap Calibrate probe. A wizard opens and takes you through four steps, always in the same order. Set aside about 50 minutes: each point needs 20 minutes to stabilise.
| Step | What happens |
|---|---|
| 1 · Prepare | The wizard reminds you what to have ready and the main thing to watch with the probe |
| 2 · Low point | The probe in the pH 7.00 solution, 20 minutes of stabilisation and the first point saved |
| 3 · High point | The same with the pH 10.00 solution |
| 4 · Done | Confirmation that the probe is calibrated, and its slope |
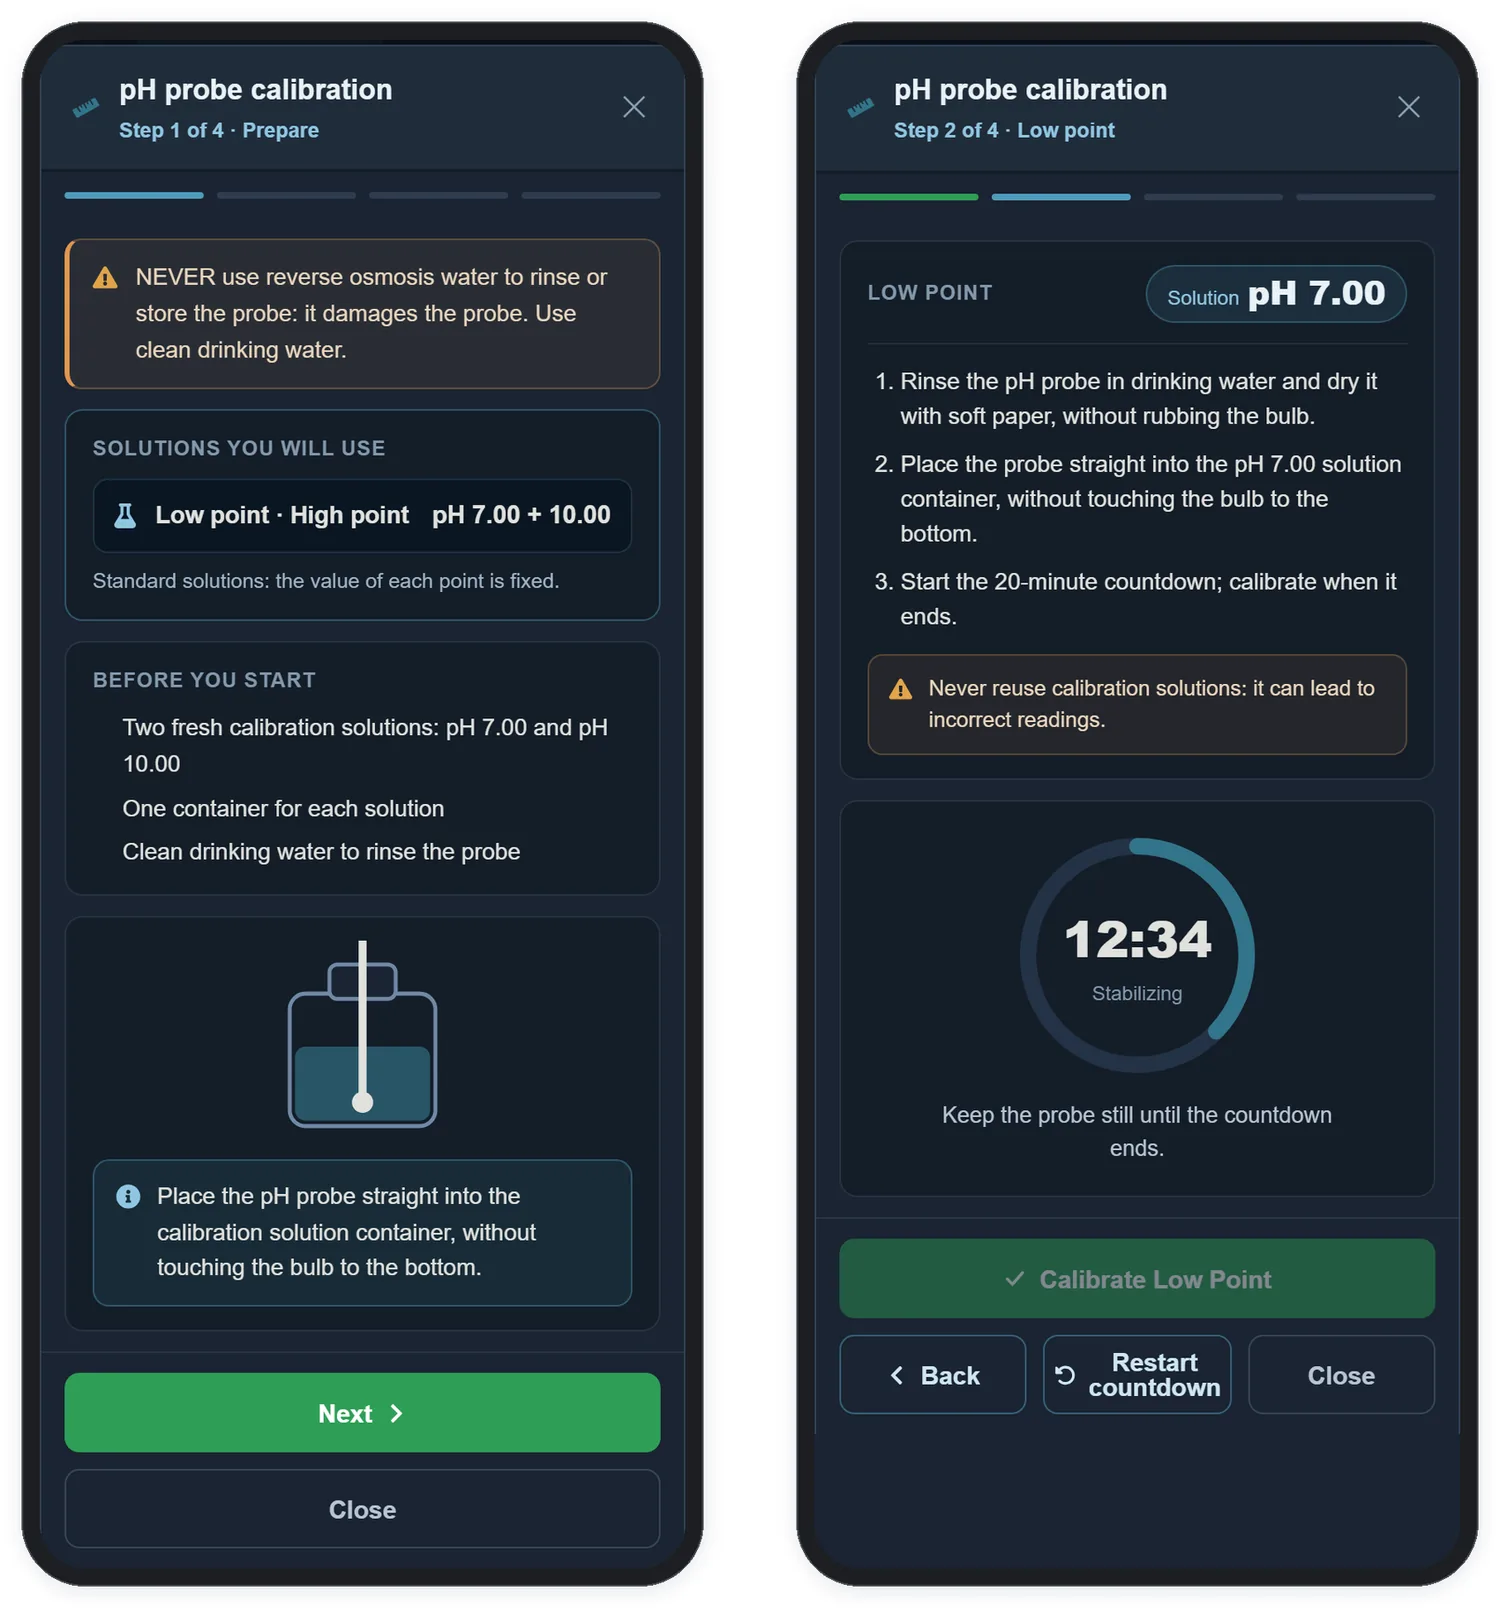
Step 1 · Prepare
Before you start, have ready:
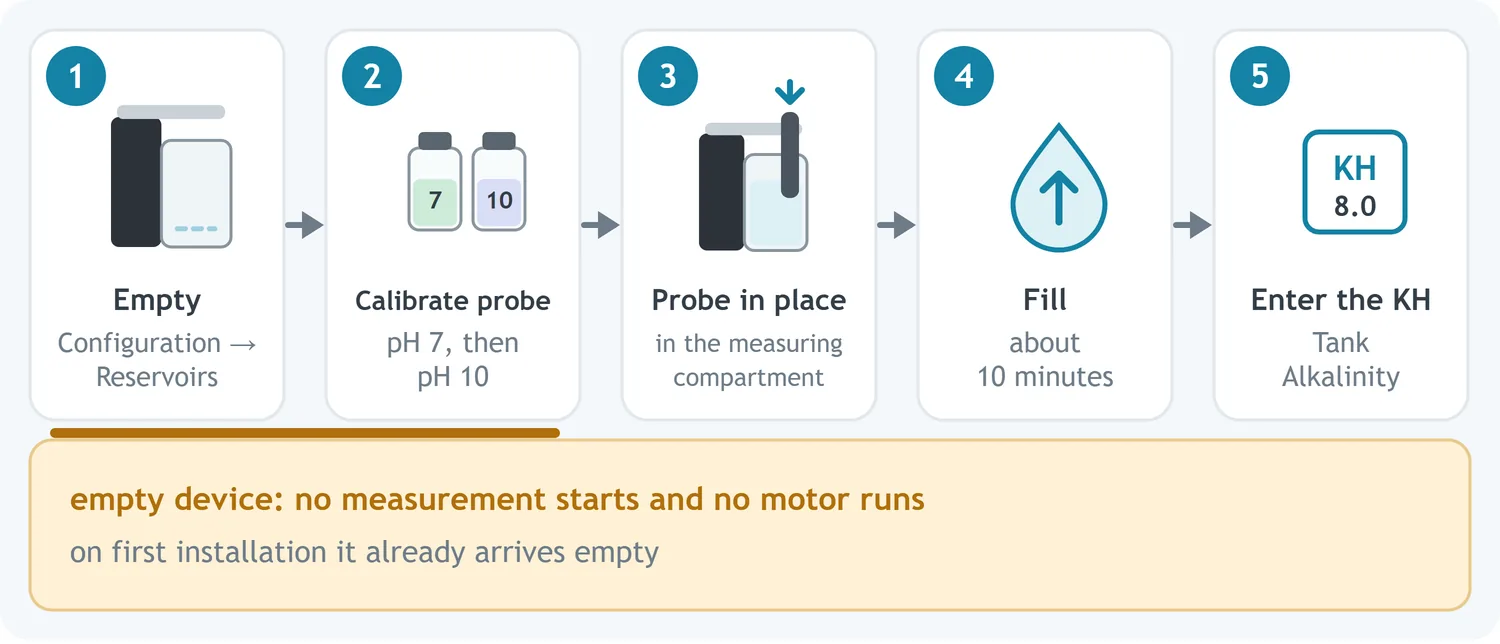
- The equipment empty, under Configuration → Reservoirs → Empty, with the probe out of the compartment. On first installation it already arrives empty.
- Two fresh calibration solutions: pH 7.00 and pH 10.00 — the ones supplied with the product.
- One container for each solution.
- Clean drinking water to rinse the probe.
The point values are fixed: the wizard always uses pH 7.00 for the low point and pH 10.00 for the high point. Tap Next.
Steps 2 and 3 · Low point and high point
Both points follow the same routine; only the solution changes:
- Rinse the probe in drinking water and dry it with soft paper, without rubbing the bulb.
- Place the probe straight into the solution container — pH 7.00 for the low point, pH 10.00 for the high point — without touching the bulb to the bottom.
- Tap Probe in place — start stabilization. A 20-minute countdown starts on a ring that fills up as it goes: Stabilizing, and at the end Stable.
- Keep the probe still until the countdown ends — that is what the line under the ring reminds you while it runs: Keep the probe still until the countdown ends. When the countdown finishes, the line changes to Reading stable — you can calibrate the point.
- When Stable reading appears, tap Calibrate Low Point — or Calibrate High Point. The wizard moves on to the next step by itself.
| On screen | What it means |
|---|---|
| Calibrate button greyed out | The countdown has not finished yet. It is only enabled after the 20 minutes — there is no skipping it |
| Restart countdown | Shown during the countdown. Use it if the probe moved or was disturbed: the countdown goes back to 20 minutes |
| Sent to the device | After the low point: the command reached the equipment |
| Saved and confirmed by the device | After the high point: the equipment confirmed that the probe is calibrated |
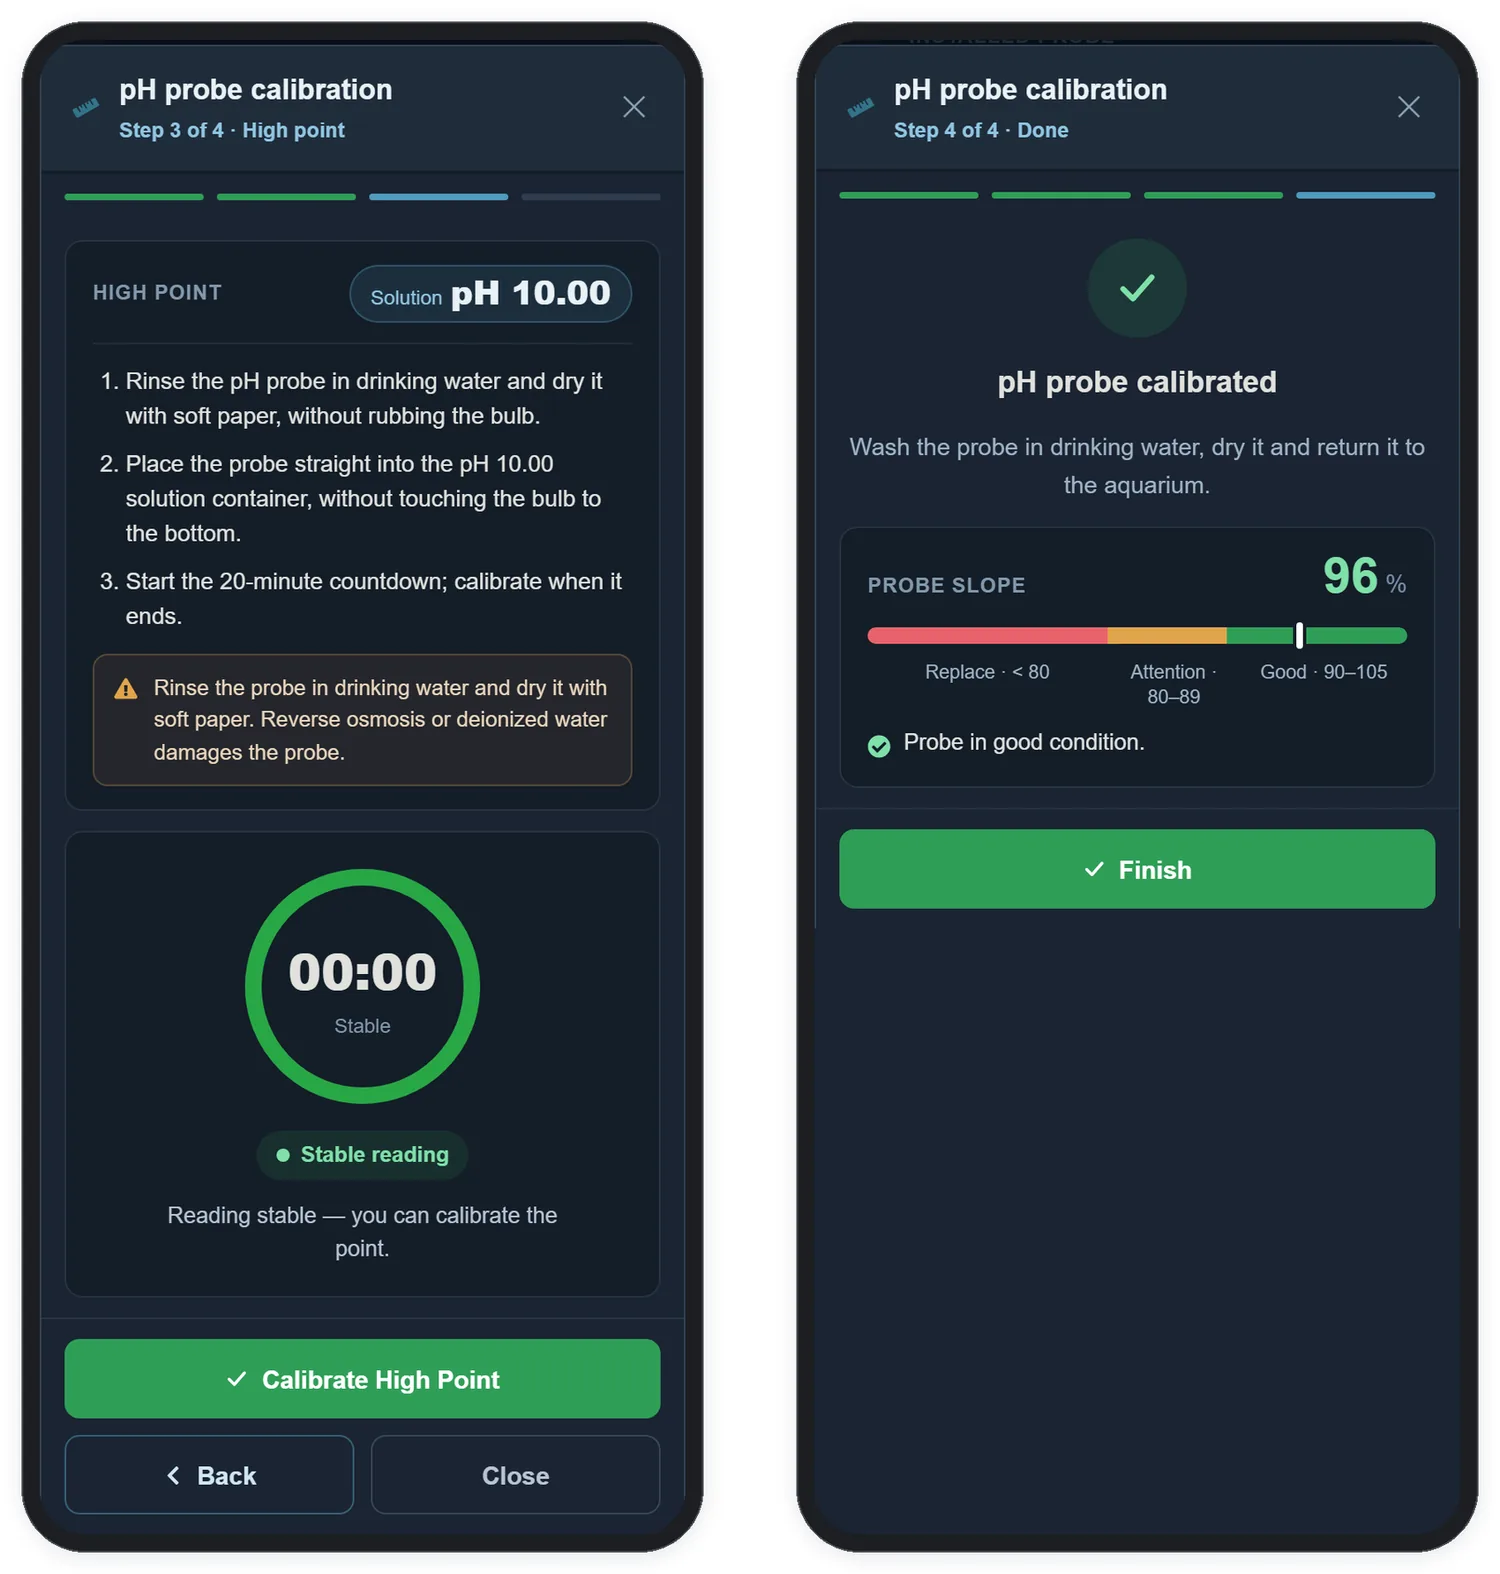
Step 4 · Done
The wizard shows pH probe calibrated. Wash the probe in drinking water and put it back in the measurement compartment. The same screen shows the probe's slope — a score of its sensitivity, as a percentage of the ideal:
| Slope | Range | What to do |
|---|---|---|
| 90 to 105 | Good | Probe in good condition |
| 80 to 89 | Attention | Probe ageing — plan the replacement |
| below 80 | Replace | Low slope — replace the probe |
Tap Finish to close the wizard. The screen then shows Probe calibrated.
4.3 Probe care
The Probe care panel, on the same screen, sums up the three rules that do the most to extend the probe's life:
| Care | Why |
|---|---|
| Every 3 months, calibrate with the pH 7.00 and 10.00 solutions | The probe drifts over time; recalibrating keeps the displayed pH reliable. Do it alongside the quarterly cleaning, which already empties the equipment (Chapter 13) |
| No reverse osmosis: never use it to rinse or store the probe | Water without salts attacks the bulb and the internal electrolyte |
| Never dry: keep the bulb moist at all times | A bulb that dries out loses sensitivity and may not recover |