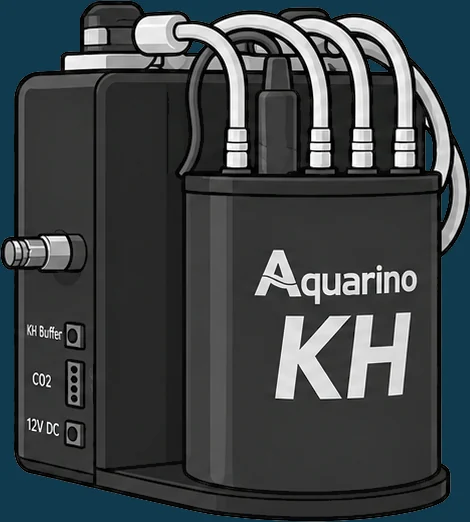
Aquarino KH

AQUARINO KH

USER MANUAL

Alkalinity measurement and control for marine aquariums.

Firmware 220 · Manager 215

Preface

Like every aquarist, I looked for what was best for my fauna and flora; it took a lot of equipment, products and study.

After buying several devices to monitor, control and help me care for my aquarium, I realised that none of them met my needs perfectly. There was difficult setup, high cost and plenty of limitations.

So I decided to use my knowledge of technology, and my own resources, to offer our hobby a new option. That is the moment Aquarino was born.

I am very proud of what we have built. Many aquarists took an active part, sending suggestions. We only reached this result because you believed in the project.

What we want to keep as the essence of Aquarino is direct contact with aquarists, close support and service, and speed in delivering new features and products.

Join our channels to ask questions, send suggestions and talk about the hobby:

Aquarino depends on all of us to move forward and become a reference in usability, features and service for aquarists worldwide.

Thank you! We will repay your trust, and take our hobby to a new level.

Laercio M F Junior

Founder and Director of Innovation, Aquarino

How to use this manual

This manual is meant to be read in order the first time, and consulted by topic afterwards. If your Aquarino KH has just arrived, follow Parts II, III and IV in sequence — in a little over an hour it will be measuring.

Four kinds of highlight appear throughout the text:

The screenshots were taken in the app, on a phone, which is how most aquarists use the Aquarino KH day to day.

PART I

Getting to know your Aquarino KH

What the equipment does, what to expect from it and what is in the box.

CHAPTER 1

What the Aquarino KH is

The Aquarino KH is an alkalinity (KH) meter and controller for marine aquariums. It measures your aquarium's alkalinity automatically and continuously — no reagents, no refills and no cost per measurement — and, if you want, corrects the KH on its own within the limits you define.

Instead of a chemical test done whenever you remember, the Aquarino KH gives you a time series: up to 24 measurements a day, all recorded, with graphs, an event log and e-mail alerts.

The set in the system: the Aquarino KH connected to the aquarium through the sampling line and, if you want automatic correction, the external dosing pump with the buffer reservoir.

1.1 What it does

  • Measures your aquarium's alkalinity at the interval you set, from 1 to 24 times a day.
  • Alerts you when KH leaves the range you consider ideal — by e-mail, by sound alert and through the panel LED.
  • Corrects upward, driving an external dosing pump with KH buffer or an _all-in-one_ solution.
  • Corrects downward, controlling the CO2 solenoid — or the peristaltic pump — of your calcium reactor.
  • Records every measurement, every dose and every decision, with export to a spreadsheet.
  • Passes the value on to other equipment, through the KH-OUT port or the Aquarino Controller integration.

1.2 What it does not do

Being clear about the limits of the equipment is part of using it well.

  • The Aquarino KH does not replace your replenishment system. It makes small corrections and sustains stability; your balling or calcium reactor is still what replaces the daily consumption.
  • It measures and decides on alkalinity alone. Calcium, magnesium and other elements are not measured and play no part in the dosing decision — although they may be replenished alongside, depending on the product you use (see the note below).
  • It does not fix an undersized system. If the reactor has run out of CO2 or the balling is underdosed, the Aquarino KH shows the problem clearly in the graph and in the event log, but solving it is up to you.
  • It does not replace your chemical test. That test is the anchor of calibration — see Chapter 10.

1.3 Who it is for

Your systemHow the Aquarino KH helps
Balling with several dosing pumpsMonitoring and alerts. You adjust your doses with real data instead of guesswork, and still have the buffer doser as a safety net.
3-in-1 balling (single dose)Automatic correction through the buffer doser. This is the scenario where the equipment comes closest to running on its own.
Calcium reactorControl of the CO2 solenoid through the Co2 Port. You set the bubble counter once and the equipment handles the fine adjustment hour by hour.
Aquarium without automatic replenishmentContinuous monitoring and history, so you know when and how much to step in manually.
CHAPTER 2

How the Aquarino KH measures

2.1 Measuring without reagents

The Aquarino KH uses a patented method to track the changes in your alkalinity, taking as its basis a reference alkalinity that you provide beforehand.

In practice this has two consequences that are worth half of this manual:

  • Since no reagent is consumed, measuring costs nothing — you can measure every hour, every day, indefinitely.
  • Since the method starts from a reference you provide, measurement quality depends directly on the quality of that information. That is why calibration gets a chapter of its own and is the most important step of the installation.

2.2 The measurement cycle

Each measurement takes about 30 minutes, and you follow the progress live, as a percentage and a time remaining, on the home screen.

StageWhat happens
PreparationThe internal chambers are emptied and rinsed
CollectionA fresh sample is drawn from your aquarium
AerationThe chambers are aerated until they stabilise
ReadingThe probe takes the required readings
ResultKH is calculated, recorded and displayed
Close-outAlerts are sent and the correction for the period is decided

Throughout the cycle the equipment keeps responding normally in the app, and your calcium reactor carries on with the plan set at the previous measurement — nothing sits idle waiting for the result.

2.3 What the measurement needs in order to work

Four conditions explain almost every case of unstable readings that reaches our support desk:

ConditionWhy
Equivalent aeration in both chambersThis is the most frequent one. The side valves should leave both chambers with strong, similar airflow. The acceptable minimum is around 5 mm of foam.
Clean chambersDirt, biofilm and settled organic matter change the reading progressively and silently.
Stable temperatureA sharp swing during the cycle shifts the result. Hence the recommendation not to install near a chiller.
A representative sampleThe hose tip needs to sit in water that has already mixed with the rest of the system — not next to the balling dosing point, not in the detritus at the bottom.

2.4 The pH probe: what actually matters

The pH probe is the most delicate part of the set, and the one that most affects confidence in the readings. Two things are commonly confused:

What it is forNeeded to measure KH?
Probe calibration (pH 7 and pH 10)Displaying the real pH of your aquarium on screen and in the graphNo
Probe health (a 0 to 100% index)Telling you whether the probe is still reliable — it considers signal noise, slope, offset and probe ageYes, this is what counts

In other words: you could never calibrate the probe and KH would still be measured. Without calibration, only the Tank pH field stays empty and the pH series is not recorded in the graph.

CHAPTER 3

In the box, and the parts

The Aquarino KH.
The Aquarino KH.

3.1 What comes in the box

  • Aquarino KH;
  • Universal-voltage 12 V / 5 A power supply;
  • 5 × 3 mm silicone hose with sinker, to connect the equipment to the aquarium;
  • pH probe with BNC connector;
  • pH 7.00 and pH 10.00 calibration solutions.

3.2 Getting to know the parts

Cutaway view, with numbered parts: internal chambers, dosing pumps and the line running to the aquarium.
Side view: the internal layout and, on the panel, the connectors — items 15 to 19 of the connector panel table.
No.PartFunction
1Acrylic structural caseStructure and protection of the assembly
2Reference dosing pumpMoves the reference water
3Transfer dosing pumpMoves the sample between chambers
4External tank dosing pumpDraws the sample from your aquarium and returns the water
5Reservoir lidAccess for cleaning
6pH probeTakes the readings used to calculate KH
7Measurement reservoirChamber where the aquarium sample is analysed
8Reference reservoirChamber holding water of known alkalinity
9Reference tank support baseSupport
10Airflow control valvesFine adjustment of each chamber's aeration
11External tankYour aquarium or sump
12Level sensorsDetect the presence of water in the chambers
13Transfer chamberIntermediate stage of the cycle
14Air stonesDiffuse air inside the chambers

Connector panel

The side panel holds every connection on the equipment.
No.ConnectorWhat it is for
15PH-IN (BNC)Input for the pH probe supplied with the equipment
16KH-OUT (BNC)Optional output: delivers KH to your aquarium controller through its pH interface (Chapter 18)
17KH Buffer (P4)Output for the external buffer dosing pump (Chapter 16)
18CO2Control output for the CO2 solenoid or the peristaltic pump of the calcium reactor (Chapter 17)
1912V DC (P4)Power, through the supply that comes with the product

Panel lights

Four indicators show the state of the equipment without you having to open the app:

LEDMeaning
CPUThe equipment is processing normally
DISKMemory card activity
WIFIConnected to your Wi-Fi network
NETInternet access and Aquarino cloud reachable

There is also a colour LED that sums up the state of the equipment without a screen:

ColourMeaning
GreenKH within the range set by target and margin
BlueKH below the range
RedKH above the range
WhiteMeasurement in progress

If you prefer the equipment discreet, all LEDs can be switched off on the Custom. screen (Chapter 23).

PART II

Installation

The right spot on the bench, the water line and the pH probe.

CHAPTER 4

Where and how to install

4.1 Where to install

Place the Aquarino KH on a flat, dry, easily reached surface intended for electronic equipment. You will come back to this spot for maintenance — leave room to open the lid comfortably.

Avoid these four places, because all of them degrade measurement quality:

AvoidWhy
Under aquarium lighting or direct sunlightAlgae grow inside the chambers and change readings over the weeks
Near a chiller or any heat sourceA sharp temperature swing during the cycle affects accuracy
Over the water line or anywhere it gets wetThis is electronic equipment; constant splashing shortens its life
A room with no ventilation at allVery still air increases the spread between measurements

4.2 Connecting the sampling hose

  1. Connect the silicone hose to the Aquarino KH, on the right-hand fitting of the Tank dosing pump.
  2. Run the other end to your sump or aquarium. The sinker supplied with the hose keeps the tip submerged.
The sampling hose goes into the right-hand fitting of the Tank pump.
The sinker holds the hose tip steady inside the sump.
CHAPTER 5

Installing the pH probe

The pH probe is delicate and needs careful handling. Set aside a few minutes and follow the steps calmly.

  1. Remove the silicone protective cap from the probe. Place the probe in a cup of water from your aquarium to rinse it.
  2. Connect the probe's BNC to the side input marked PH-IN.
  3. Carefully insert the probe into the measurement compartment of the Aquarino KH.
Step 1 — remove the protective cap and rinse the probe.
Step 2 — connect the BNC to the PH-IN input.
Step 3 — insert the probe into the measurement compartment.
PART III

The Aquarino app

Creating your account, adding the equipment and sharing access.

CHAPTER 6

Installing the app and creating your account

Everything you do with the Aquarino KH happens through the Aquarino app, available for Android and iPhone. It is how you add the equipment, follow the measurements and change settings — at home or anywhere else.

6.1 Installing the app

Search for Aquarino in your phone's app store and install it. The same app serves the whole product line — Aquarino KH, Controller and Display.

6.2 Creating your account

When you open the app for the first time, tap Create an account and fill in:

FieldWhat to enter
Name and SurnameHow you want to be identified in the app
TelephoneWith the country code. Used by support to reach you
EmailAn address you actually check — this is where the activation PIN and every equipment alert will arrive
Password and Confirm passwordSee the requirements below

Password requirements

  • 8 to 60 characters;
  • at least one uppercase letter;
  • at least one lowercase letter;
  • at least one number;
  • at least one special character.

The app shows the requirements on screen and ticks each one off as you type.

6.3 Activating the account

Once you have signed up, you receive a 6-digit activation PIN by e-mail. On the Activate account screen, type the code into the six boxes and tap Activate account.

6.4 First sign-in

On your first sign-in the app offers two optional features that are worth enabling:

FeatureWhat it is for
Enable biometric lockRequires your fingerprint or face to open the app. Recommended, since the app commands equipment on your aquarium
Enable push notificationsAlerts arrive straight on the phone, in addition to e-mail. It is the fastest way to learn about an off-target KH or an empty reservoir

Once you have chosen, tap Start app.

CHAPTER 7

Adding your Aquarino KH

The app has a wizard that handles the whole process: it talks to the equipment, hands over your Wi-Fi password and registers it in your account. Six steps, a few minutes.

7.1 Before you start

  • The Aquarino KH should be assembled and plugged in (Chapters 4 and 5);
  • Have your Wi-Fi network name and password at hand;
  • Stay close to the equipment during the process;
  • Confirm your network is 2.4 GHz — see section 7.4.

7.2 The wizard, step by step

1 · Device type

Choose Aquarino KH from the list of devices.

2 · Prepare your device

The app asks you to switch the equipment on and wait for two signals: first the startup beep, then confirmation that the green Wi-Fi LED is blinking. That blinking is what tells you the Aquarino KH is ready to be configured.

The screen itself shows the three LEDs for you to check — CPU, Disk and WiFi — and asks whether the green one is blinking. If it is, carry on; if not, unplug the equipment, plug it back in and wait again.

3 · Connect to Aquarino

The equipment creates a temporary Wi-Fi network called AquarinoKH, and the app lists it under *Available networks*. You need to connect your phone to it:

  1. Tap Open Wi-Fi Settings — the app takes you straight to your phone's settings.
  2. Select the AquarinoKH network.
  3. Return to the app and tap I am connected.

4 · Network

Back in the app, the Network screen asks you to pick the network the equipment will use day to day. Choose your Wi-Fi network from the dropdown, enter the password and tap Configure.

5 · Configuring

The app sends the settings and the equipment restarts to join your network. The screen shows a countdown of about five minutes — the time the Aquarino KH needs to reboot and connect.

6 · Done

The final screen confirms: _"Enjoy your new KH."_ Tap Done.

The Aquarino KH appears in your device list and starts reporting. From here on you can reach it from anywhere, without being on the same network.

7.3 If the connection is not confirmed

The wizard warns you when it cannot confirm that your phone is on the equipment's network. Work through this list:

SituationWhat to do
The phone switched back to your home network on its ownSome phones change networks automatically when they detect the current one has "no internet". Turn that automatic switching off in Wi-Fi settings and connect again
The temporary network does not appearConfirm the Wi-Fi LED is blinking. If the equipment has been configured before, unplug it, wait a few seconds and plug it back in
The network appears but will not connectMove the phone closer to the equipment and try again
Setup finished, but the equipment is not in the listThe network password may have been mistyped, or the signal where the equipment sits is too weak. Repeat the process, checking the password

7.4 Requirements for your Wi-Fi network

RequirementDetail
2.4 GHz onlyThe Aquarino KH does not connect to 5 GHz networks. If your router is dual-band, use the 2.4 GHz band — on many models it is enough to create a separate network name for it
Signal above 50%Networks with weak signal are not listed. Weak signal is the most common cause of dropouts after installation
Name without special charactersAvoid spaces and accents in the network name. Rename it if necessary

Understanding signal strength

BandPercentagedBmSituation
Excellent80–100%−30 to −50Ideal for connection
Good60–80%−50 to −60Stable connection
Fair50–60%−60 to −67Acceptable, may fluctuate
Poorbelow 50%below −67Connecting not recommended
CHAPTER 8

Getting around the app

With the equipment added, the app opens on your device list. Tap the Aquarino KH to go into it.

Navigation sits at the bottom when you are on a phone and at the top on larger screens. There are six areas:

AreaWhat you find there
HomeThe current state of the aquarium at a glance (Chapter 20)
GraphsHistory, comparisons and export (Chapter 21)
LogsA record of everything the equipment did (Chapter 22)
Custom.Display preferences (Chapter 23)
ConfigurationCalibration, target, doser, Co2 Port and integrations
SystemVersions, network, maintenance and diagnostics (Chapter 24)
CHAPTER 9

Sharing access

A beautiful aquarium demands constant attention, and having to travel for a few days tends to cause worry. Through the app you can share access to your Aquarino KH with someone you trust, who can watch over it and act while you are away.

  1. In the device list, find the Aquarino KH you own.
  2. Open the sharing option for that equipment.
  3. Enter the person's e-mail and confirm.
PART IV

Calibration

The step that determines the quality of every measurement that follows.

CHAPTER 10

Full calibration

A full calibration empties every chamber of the Aquarino KH, draws a fresh sample and anchors the equipment to an alkalinity value that you measure with your chemical test.

Run a full calibration in these situations:

  • at the first installation of the equipment;
  • after cleaning the chambers internally;
  • if the internal level has dropped because of repeated power cuts;
  • if readings are inconsistent and you have already ruled out the causes in Chapter 13.

10.1 Before you start

10.2 Step by step

  1. In the app, open Configuration and tap Reservoirs.
  2. Tap Empty. Repeat until all internal reservoirs are completely empty and no more water comes out of the hose connected to your tank.
  3. Check visually that the compartments are empty before going on.
  4. Tap Fill. The equipment draws the water and calibrates the dosing pumps automatically. This takes about 10 minutes.
  5. Using your chemical test, measure the KH of the aquarium water. Follow the kit manufacturer's instructions to the letter.
  6. Go back to Configuration and open Reference Alkalinity.
  7. Enter the measured value and tap Apply. The Aquarino KH starts the calibration automatically.
The Reservoirs screen: Empty, Fill and Stop.
The Reference Alkalinity screen, where you enter the value from your chemical test.
CHAPTER 11

Partial calibration

Partial calibration is the day-to-day adjustment: you measure KH with your chemical test and tell the equipment the value, without emptying anything. It takes less than a minute.

  1. Measure your aquarium's KH with a chemical test you trust.
  2. Open Configuration → Reference Alkalinity.
  3. Enter the measured value and tap Apply.
CHAPTER 12

The pH probe: calibration and health

This screen brings together everything about the probe: the current reading, the health index, the installation date and two-point calibration. You reach it through Configuration → pH Probe.

The pH Probe screen holds reading, health, age and probe calibration.

12.1 Probe health

The health indicator is an index from 0 to 100% summarising probe quality from four factors: signal noise, slope, offset and probe age. It also appears on the home screen among the indicators.

RangeRatingWhat to do
90–100%ExcellentReliable probe — no action needed
75–89%GoodNormal operation — just watch the trend
55–74%FairRecalibrate and plan probe replacement
below 55%PoorReplace the probe — unreliable readings

12.2 Logging a probe replacement

The screen shows the installation date, how many days the probe has been in use and the recommended replacement date. When you change the probe, tap Log probe replacement to reset that count.

12.3 Two-point calibration

Probe calibration is what lets the equipment display the real pH of your aquarium. It is not required in order to measure KH — see section 2.4.

You will use the pH 7.00 and pH 10.00 solutions supplied with the product. For each point:

  1. Rinse the probe with distilled water.
  2. Immerse the probe in the buffer solution.
  3. Wait about 10 minutes for the reading to stabilise.
  4. Tap Calibrate pH 7.00 — or Calibrate pH 10.00 — to send the command.
CHAPTER 13

What interferes with the measurement

If readings are fluctuating more than you expect, work through this chapter before recalibrating. The causes fall into two groups: mechanical, tied to the equipment and the sample, and chemical, tied to your aquarium water. In the vast majority of support cases the cause is in the first group.

13.1 Mechanical causes

CauseHow to identify and resolve it
Unequal aeration between the chambersThe most frequent one. Check the side valves: both chambers need strong, equivalent airflow, with at least 5 mm of foam. If the air pump is weak, clean the air system or replace the pump.
Dirt and biofilm in the chambersEmpty, open the lid, clean, then refill and recalibrate. There is a video of the procedure at https://youtube.com/shorts/qm--dZ7LNUg
Worn pH probeCheck Probe Health (Chapter 12). Below 55%, or more than 12 months in use, replace it.
Stray voltage in the waterCurrent leaking from some electrical device in the aquarium interferes with the probe reading. Test by switching devices off one at a time.
Unrepresentative sampleMove the hose tip: away from detritus, from the skimmer and from the balling dosing point.
Sharp temperature swingsMove the equipment away from the chiller or any heat source.

13.2 Your aquarium chemistry

This group of causes is less common, but it is usually the most confusing when it shows up — because the equipment is still working perfectly and yet disagrees with your chemical test. It is worth understanding why.

The table below gathers what affects the measurement, the normal range for a reef aquarium and the point beyond which it is worth investigating:

ParameterNormal rangeWatch fromWhy it weighs on the measurement
Salinity34 to 36 ppt (1.025–1.027)outside 33–37 pptThe most influential deviation of all. The entire chemistry of marine water depends on salinity — get it wrong and everything else shifts with it
Boron / borate4.0 to 5.0 mg/Labove 6 mg/LThe second largest buffer in marine water, behind carbonates. It is also the most likely interferent in practice, because many salts and additives add borate
Dissolved organic matterclear water, active skimmeryellowing water, skimmer stopped or undersizedOrganic acids join the alkalinity sum — and also foul the chambers, adding a mechanical cause on top
Ammonianot detectableany detectable traceShows up in a cycling tank or after losing an animal. It joins the sum and signals that the system is not stable
Phosphate (PO4)0.03 to 0.10 ppmabove 1.0 ppmThe individual contribution is small; it only starts to weigh at levels far above normal reef values
Silicate (SiO2)below 1 ppmabove 3 ppmSame situation as phosphate. Relevant for anyone deliberately dosing silicate
Temperature24 to 27 °C, stableswings above 2 °C during the cycleShifts the chemical equilibria of the sample while it is being analysed

13.3 Real fluctuation or reading noise?

PART V

Putting it to work

Set the target, choose how it corrects, and let the equipment handle the rest.

CHAPTER 14

Target alkalinity, frequency and alerts

This is the screen that governs almost everything: the value you consider ideal, how much variation you tolerate, how often to measure and how you want to be told. You reach it through Configuration → Target Alkalinity.

The Target Alkalinity screen holds target, margin, frequency, notification and time window.

14.1 Target alkalinity

This is the KH you want to hold. For reef aquariums the usual range is 7 to 9 dKH.

14.2 Tolerance Margin

The margin sets the band around the target within which the equipment considers everything fine. It runs from 0.15 to 1.00 dKH.

14.3 Measurement frequency

The Measure every field sets the interval in hours, from 1 to 24. Since measuring consumes no reagent, there is no cost in measuring often.

IntervalWhen it makes sense
1 hourAquariums with a calcium reactor, unstable systems, or the first days of use
2 to 4 hoursGeneral use. Good resolution to follow the daily cycle without crowding the graph
6 to 12 hoursVery stable systems, where you only want to watch the trend

14.4 Time window

Start time and Stop time limit measurements to a period of the day. Leaving both at 00:00 means the equipment measures around the clock.

14.5 Notifications

The field When do you want to be notified sets when the equipment sends e-mail:

OptionBehaviour
NeverNo measurement e-mails. You still see everything in the app
Off targetE-mail only when KH leaves the band set by target and margin
AlwaysE-mail on every completed measurement

14.6 Sound Alert

Turns the audible warning on or off when KH is outside the band. The panel colour LED keeps working either way.

CHAPTER 15

Monitoring mode

This is the simplest mode: the Aquarino KH measures and warns, but does not act. All correction stays in your hands.

You do not need to configure anything to use it — just leave the Buffer Doser on None and the Co2 Port on Disabled.

If KH isWhat the equipment does
Above the bandE-mail with the result, sound alert and red LED
Inside the bandE-mail with the result (if configured) and green LED
Below the bandE-mail with the result, sound alert and blue LED

15.1 Who this mode is for

For anyone who already has a working replenishment system — balling with several pumps, or a well-tuned calcium reactor — and wants, above all, to see what is happening.

With the history at hand you can answer questions that used to be guesswork:

  • Is my daily alkalinity consumption really what I think it is?
  • Does the drop happen during the day or at night?
  • Did that water change move KH? By how much?
  • After I increased the dose, did the aquarium actually settle?
CHAPTER 16

Correction through the buffer doser

In this mode an external dosing pump connected to the KH Buffer port raises alkalinity when it falls below the band. It is the mode for anyone using 3-in-1 balling, and a good safety net for anyone on a calcium reactor — if the CO2 runs out, the doser holds the fall.

The Buffer Doser screen: mode, reservoir, calibration and limits.

16.1 Choosing the correction mode

ModeWhat it does
NoneNo correction. The doser is never driven
NormalDoses half of what is needed to reach the target, with a maximum of 0.35 dKH per dose
FastDoses the full difference to the target, within the mode's ceiling

16.2 Calibrating the dosing pump

Calibrating the pump is what makes an order to "dose 25 mL" actually deliver 25 mL. Doser tubing loses flow with use, so it is worth repeating this from time to time.

Open Configuration → Buffer Doser → Calibration. Three steps:

Step 1 · Fill the tubing

Click Purge and let the pump run until the tubing is completely full of buffer, with no bubbles. Click Stop when done.

Step 2 · Measure what the pump delivers

  1. Put the end of the tubing into a graduated container — a cylinder, syringe or measuring cup.
  2. Click Start Calibration. The pump will run for 60 seconds.
  3. Measure the volume delivered and enter it in Measured volume, in millilitres.

Step 3 · Check

Adjust the Dosing rate and click Test. The equipment should deliver 5 mL of buffer.

If it deliveredWhat to do
More than 5 mLLower the dosing rate and test again
Less than 5 mLRaise the dosing rate and test again
5 mLDone. The pump is calibrated

16.3 Telling it what your product yields

With the pump calibrated, the equipment still needs to know what your product yields. The Volume to raise 1.00 dKH field is what turns "dose 0.25 dKH" into millilitres: it wants the volume, in mL, that raises your whole system by 1 dKH.

To work it out you need two numbers — the product's yield and the real water volume of your system.

ProductYield (per 100 litres)
Barrak — ONE5 mL raise 1 dKH
Barrak — BUFFER5 mL raise 1 dKH
Fauna Marin — Reef2Reef17 mL raise 1 dKH
Tropic Marin — All for Reef17.85 mL raise 1 dKH
Triton — CO333 mL raise 1 dKH
Aquaforest — KH Buffer38 mL raise 1 dKH

16.4 Maximum per day correction

This is the equipment's safety stop: the total it may raise alkalinity within a continuous 24-hour window. The default is 1.00 dKH per day.

16.5 The buffer reservoir

The screen shows the current content in mL and the percentage left. Set Capacity to your bottle's volume and tap Refill every time you top it up — that is how the equipment knows how much remains.

When the level crosses the percentage set in Custom. → Low KH Buffer %, the indicator turns red on the home screen and you get a warning.

CHAPTER 17

Calcium reactor through the Co2 Port

For anyone running a calcium reactor, the Aquarino KH controls the Co2 Port — a power outlet that switches on and off according to what the aquarium needs. It is the equipment's most sophisticated feature and the one that most reduces your manual work.

17.1 The decision, in one sentence

At every measurement, the equipment decides how many minutes the CO2 port stays on until the next one.

What happens
1 · MeasuresThe aquarium KH, every hour, 24 hours a day
2 · DecidesCompares it with your target and with what happened over the last 24 hours
3 · DrivesSwitches the port on for the calculated time. It switches off by itself

That is 24 decisions a day, 8,760 a year. There is no factory table and no programmed schedule: each unit builds its own model from what it measures in your aquarium. Two aquariums with the same target receive CO2 in different amounts and at different hours, because they consume differently.

17.2 How to connect — pick your scenario

Your reactorWhat to plug into the Co2 Port
Without a pH controllerConnect the CO2 solenoid directly to the Co2 Port. The equipment decides, every hour, how long to release CO2 into the reactor.
With a pH controllerLeave the solenoid with your pH controller and connect the peristaltic pump to the Co2 Port. The equipment then releases or cuts the reactor's water flow for the time needed.
The Co2 Port screen explains both wiring scenarios and the ideal operating ranges.

17.3 What it looks at to decide

Two things, and each answers a different question.

What it looks atThe question it answersWhy it helps
Where KH is nowWhere are we?A single reading, compared with the target. It is trustworthy right away, because the reading error is well below the margin — and it is what makes the equipment react quickly to a water change
Where it went over 24 hWhere are we heading?The difference between KH now and KH 24 hours ago, discounting what the doser added. It is what stops the equipment chasing noise

17.4 Why 24 hours, and not 1 hour

Two reasons, and both belong to the aquarium — not to the equipment.

ReasonExplanation
NoiseOver 1 hour, the natural variation of the reading is larger than the real consumption of that period: measuring the rate in that window would be reading noise dressed as information. Over 24 hours the signal is roughly 14× larger than the noise.
PhotoperiodCorals consume with the lights on and almost nothing in the dark. A 12-hour window overnight would give nearly zero; 12 hours of daylight would give double the average. Over 24 hours the whole day enters once and the effect cancels itself.

17.5 It learns your aquarium's routine

Nobody programs a lighting schedule. The equipment discovers your aquarium's rhythm from how it responds — and the photoperiod curve appears on its own in the data.

Alkalinity consumption by hour of day in a real aquarium, measured by the equipment itself over weeks. Peak at 17:00, minimum at 07:00 — a ratio of 4.8 to 1 between them.

Knowing which hours the aquarium consumes most, the equipment delivers more CO2 in exactly those hours:

Average percentage of time with the port on, by hour of day, in the same aquarium. The distribution is learned, not configured, and refines itself over the days.

17.6 The result: KH swings less

Same aquarium, same total CO2 for the day. Only the hours it is delivered change — and the difference shows in stability:

KH across one day, in the same aquarium and with the same total CO2. Distributed along the routine, the swing falls from 0.35 to 0.19 dKH.

Less swing across the day means less stress for corals: KH spends more time near the target and less time at the extremes.

17.7 Three safety stops

None of them depends on you configuring anything.

StopWhat it does
Daily limitThe equipment never tries to move KH by more than 1 dKH a day. More CO2 means more acid entering the aquarium — reactor effluent leaves at a pH near 6 — and abrupt alkalinity change stresses corals
Automatic cutIf KH climbs well above your target, the port is cut immediately and only returns once KH comes down. It does not wait for the next measurement
Distribution does not add upThe daily routine can reorganise the total, never increase it

17.8 Ideal range and adjusting the bubble counter

Your job here is just one thing: set the reactor's bubble counter so the port works within the recommended range. Do that, and the equipment handles the rest.

PeriodIdeal rangeWhy
During the photoperiod75% – 90%With the lights on consumption is higher — the port should run in the upper range
Outside the photoperiod15% – 30%With the lights off consumption falls — the port should run in the lower range

17.9 How to read the port percentage

Four readings cover almost everything you will see day to day:

What you seeWhat it meansWhat to do
It varies a lot across the day — 10% in the morning, 70% at nightNormal. That is your aquarium's routine, learnedNothing
It sits at 0% for some hours, with KH above targetNormal. It is correcting downward, on purposeNothing
It climbs day after day and KH barely followsThe aquarium started consuming more, or the reactor is losing strengthWatch for 2 to 3 days
It sits at 100% for hours and KH does not riseThe reactor has reached its limit. Software cannot fix thisCheck CO2, media and flow

17.10 How to read the graph across days

The shape of the graph tells the story. Three shapes matter:

ShapeWhat it isWhat it means
Wavy and steadyRises and falls every day in the same pattern, with no long-term trendThis is the healthy state. The equipment found its point and is holding it
A step up, then settlesClimbs over a few days and then stabilises at a higher levelThe aquarium started consuming more and the equipment followed. Expected after coral growth or a lighting change
Climbing without stopping, touching 100%Grows day after day and starts hitting the ceiling oftenThe reactor is falling behind. Check CO2, media and flow before KH drops

17.11 When the reactor cannot keep up

This is the case where the equipment needs you. It shows the symptom; the cause is physical.

Aquarium KH against the target, day by day: alkalinity settles below target and stops rising.
Percentage of time with the port on over the same period: it climbs to 100% and stays there, day after day.

What to check, in this order:

  • CO2 cylinder empty or low on pressure;
  • Calcium media exhausted;
  • Effluent flow too low;
  • Reactor undersized for the aquarium's volume.

17.12 What the equipment does not do

Does notDetail
Does not guess your lighting scheduleIt learns the routine from the aquarium's response. If you change the photoperiod it takes a few days to relearn — and relearns on its own
Does not diagnose the reactorIt shows that the port is at maximum and KH is not rising. The conclusion about CO2, media or flow is yours
Does not replace your own readingThe equipment acts on what it measures. If the pH probe is poor, the measurement is poor — and so is the correction. Keep calibration current

17.13 Correction mode and default status

SettingWhat it does
Correction modeEnables or disables automatic control of the Co2 Port. It ships Disabled
Default statusSets whether the port stays on or off when automatic control is disabled, or when the equipment has no basis to decide — during filling, emptying, or right after startup
CHAPTER 18

Integrating with other equipment

18.1 The KH-OUT port

The Aquarino KH has a side BNC port called KH-OUT. Through it the equipment emits a signal that mimics a pH probe — so your aquarium controller can read the KH value through the pH input it already has.

The Calibrate KH Output Port screen, with the simulation points.

With that you can build rules in your controller, such as:

  • cut the reactor's CO2 when KH is high;
  • interrupt the balling cycle if alkalinity rises too far;
  • trigger an extra dosing cycle when KH falls.

Calibrating the port

  1. Connect the BNC cable from the KH-OUT port to your controller's pH input.
  2. On the screen, select Simulate pH 7 and set the low calibration point on your controller.
  3. Select Simulate pH 10 and set the high point.
  4. Return to Current KH so the equipment resumes sending the real reading.

18.2 Integrating with the Aquarino Controller

If you have an Aquarino Controller, the integration is direct and needs no cable:

  1. Open your Aquarino Controller in the app.
  2. Go to the Controller's System screen and copy the UUID.
  3. Return to the Aquarino KH, under Configuration → Aquarino Controller Integration.
  4. Paste the value into the Controller UUID field and tap Apply.
The integration screen only asks for your Aquarino Controller's UUID.
CHAPTER 19

The first seven days

This chapter is a route. If you have just installed the equipment, follow it and by the end of the first week you will have an Aquarino KH tuned to your aquarium — and, more importantly, the confidence of knowing why it is tuned that way.

Day 1 — install and calibrate

  • Install the equipment, the hose and the probe (Chapters 4 and 5).
  • Install the app, create your account and add the equipment (Chapters 6 and 7).
  • Run a full calibration with a chemical test you trust (Chapter 10).
  • Set target and margin (Chapter 14). Leave correction off for now.
  • Set the interval to 1 hour and notification to Always.

Days 2 and 3 — observe

  • Change nothing. Let the equipment measure.
  • Once a day, open Graphs and look at the last 24 hours.
  • Check the aeration in both chambers (Chapter 13) — it is the adjustment that most affects reading quality.

By the end of the third day you should be able to answer: what is my aquarium's daily KH swing, and does it follow the photoperiod?

Day 4 — check against the chemical test

  • Run a chemical test at the same time of day and from the same collection point as the equipment.
  • Compare it with the value measured at that hour.
  • If the difference is smaller than your kit's margin of error (± 0.30 dKH), all is well — do not recalibrate.
  • If it is larger, run a partial calibration (Chapter 11).

Days 5 and 6 — turn correction on

  • If you use 3-in-1 balling or want the safety net: set the Buffer Doser to Normal and calibrate the pump (Chapter 16).
  • If you use a calcium reactor: enable the Co2 Port and start watching the hourly percentages (Chapter 17).
  • Follow the event log in Logs to see the decisions the equipment is making.

Day 7 — adjust and settle

  • Calcium reactor: set the bubble counter so the port lands in the ideal ranges (75–90% during the photoperiod, 15–30% outside it).
  • Doser: if you see daily-limit warnings, the problem is your main replenishment, not the Aquarino KH.
  • Change notification from Always to Off target.
  • If the system is steady, you can raise the measurement interval to 2–4 hours — unless you are using the Co2 Port, which requires the hourly cadence.
PART VI

Getting to know the screens

Where each piece of information lives, and what it is telling you.

CHAPTER 20

Home screen

The home screen exists to answer, in three seconds, the question you ask every morning: is my aquarium all right?

The Home screen gathers alkalinity, the measurement in progress, indicators and recent history.

20.1 Status bar

Present on every screen, it shows four states of the equipment:

IconMeaning
AlertLit when KH is outside the band set by target and margin
Wi-FiThe equipment is connected to your network
InternetThe equipment has internet access and can reach the Aquarino cloud
UpdateA new version is available to install

On the right there are also the screen lock button, which prevents accidental taps, and the red stop button, which immediately interrupts whatever is running.

20.2 Alkalinity

The main block shows the current KH in large type, in the unit you chose, with a word underneath giving the trend — _stable_, for example.

Beside it are the highest and lowest values of the period, which show your aquarium's swing at a glance. Two close numbers mean a stable system; two distant ones, a system that oscillates.

20.3 Measurement

While a cycle is running, this block shows the percentage complete, the current stage and the time remaining. Outside a cycle it shows the date and time of the last and next measurement, and the suggested date for the next calibration.

20.4 Indicators

Nine dials show the state of the parameters the equipment tracks:

IndicatorWhat it shows
Probe HealthQuality index of the pH probe, 0 to 100% (Chapter 12)
CO2 AirAmbient CO2 concentration, in ppm. Between 400 and 600 ppm is usual indoors
CO2 WaterCO2 concentration in the aquarium water, in ppm
KH BufferHow much is left in the doser reservoir, as a percentage. Turns red below the configured limit
Co2 PortPercentage the port is driven for in the current hour (Chapter 17)
Calcium, Magnesium, Nitrate, PhosphateParameters you enter manually, from your own tests. The Aquarino KH does not measure these — it stores and displays them so you have the whole picture on one screen

20.5 Last measurements

The line graph shows recent alkalinity and pH readings side by side. It is where the daily swing shows most clearly — and where you notice a trend before it becomes a problem.

CHAPTER 21

Graphs

If the home screen answers "is everything fine right now?", the graphs screen answers "what has been happening?". It is the equipment's most powerful tool for anyone who wants to understand their own aquarium.

The Graphs screen: period, series, comparisons, and line or table view.

21.1 Choosing what to see

At the top you set the period — the last 24 hours or a specific month — and select the series to display:

SeriesWhat it records
KHThe measured alkalinity
pHThe aquarium pH (requires the probe to be calibrated)
CO2 AirAmbient CO2
CO2 WaterCO2 dissolved in the water
Co2 PortThe port's drive percentage, hour by hour
Buffer (mL)Volume delivered by the buffer pump
Buffer KHHow much alkalinity that dose represented

21.2 Line or table

The toggle switches between the line graph, better for spotting trends and patterns, and table view, better for checking exact values hour by hour.

21.3 Automatic comparisons

Below the selectors, three cards answer the most common questions without you having to interpret the graph:

ComparisonWhat it is for
vs. same time yesterdayIsolates the daily variation. If 3 pm today differs from 3 pm yesterday, something genuinely changed
vs. previous hourShows the recent movement — how fast KH is rising or falling
vs. day averagePlaces the current reading within its own day, separating the normal from the exceptional

21.4 Exporting

The two icons beside the period selector export the history as a spreadsheet or as an image. The spreadsheet opens in Excel or Google Sheets and lets you build your own analyses, compare months and follow the system's long-term evolution.

CHAPTER 22

Logs

The event log tells you, in order, everything the equipment did and why. It is the first screen to open when something did not go as expected.

Each line carries the type, the message, the date and its cloud sync state.

Every record has a type — Info for normal operation, Warning for situations worth your attention — and an icon showing whether it has been synced to the cloud.

22.1 Messages you will come across

MessageWhat it means
Measurement startedA cycle began
Measurement finished: KH = 8.01 dKHThe cycle ended with that result
Buffer dosed: 35.0 ml (KH +0.35)The doser ran, with the volume and the expected effect
Dose skipped: daily correction limit reachedThe 24-hour quota is spent. If this appears often, your main replenishment is undersized (Chapter 16)
Re-testThe measurement diverged sharply from the previous one and the equipment repeated it to confirm
CO2 port 45% (27 min)The Co2 Port plan for the coming hour (Chapter 17)
Buffer emptyThe doser reservoir has run out
CHAPTER 23

Custom. — preferences

This screen holds display preferences. Nothing here changes how the equipment works — only how it presents itself to you.

The Custom. screen gathers language, units, formats and reminders.
PreferenceOptions
LanguagePortuguese or English
LEDTurns the panel lights on or off. Useful if the equipment sits in a living space
Hour12- or 24-hour format
AlkalinityUnit of measurement: dKH, ppm CaCO3 or mEq/L
DateDate display format
Low KH Buffer %The percentage at which the reservoir indicator starts warning: 5, 10 or 20%
Calibration ReminderReminder frequency: weekly, monthly, quarterly, half-yearly or yearly
CHAPTER 24

System and Status

24.1 The System screen

It holds the equipment's identification, its network details and the maintenance actions.

The System screen: identification, versions, network and maintenance actions. The identifiers in this image have been replaced with example values.
InformationWhat it is for
UUIDThe equipment's unique identifier. It is what you give to support, and what you use for the Aquarino Controller integration
FirmwareVersion of the equipment's internal system
ManagerVersion of the interface
LicenseLicensing status. Equipment registered with your e-mail shows as Licensed — if it shows otherwise, check the User E-mail field (Chapter 6)
UptimeHow long the equipment has run without restarting
MAC addressNetwork identity. This is what you use to reserve its IP on your router
SSID / IPThe network it is connected to and the address to reach it

Available actions

ButtonWhat it does
System StatusOpens the detailed diagnostics (section 24.2)
Date/TimeSets the internal clock
ConfigurationShortcut to the configuration screen
Wifi SettingsChanges the Wi-Fi network
RestartRestarts the equipment. No settings are lost
ShutdownEnds operation safely before you unplug it
Factory ResetErases all settings and returns to the original state

24.2 System Status

This is the diagnostics screen. You will probably never need it — but when you do, it is the one support will ask you to open.

System Status groups alkalinity, probe, device, inputs and outputs, network, levels, dosers and automation.
BlockWhat it reports
AlkalinityReference KH, tank KH, pH, fill and calibration dates
Analog pHHealth, noise, millivolts, whether it is calibrated, and probe slope
DeviceInternal health: I2C, clock, memory card, filesystem, free memory and fragmentation
I/OState of inputs and outputs, including the air pump and the Co2 Port
NetworkDHCP, signal quality, error counters, last cloud sync and MQTT state
LevelsLevel sensors for chambers A, B and C
DoserState of each dosing pump
AutomationProcess in progress, error, elapsed and remaining time, and percentage
PART VII

Maintenance and support

Routine care, fixes for the common problems, and how to reach us.

CHAPTER 25

Maintenance routine

The Aquarino KH asks little, but it asks regularly. This routine keeps measurements trustworthy over the years.

FrequencyWhat to do
WeeklyLook at the last 24 hours in the graph · check the aeration foam in both chambers · check the buffer reservoir level
MonthlyRun a chemical test and compare with the equipment · partial calibration if needed · inspect the chambers visually
QuarterlyClean the chambers internally, then run a full calibration · check the doser tubing
YearlyReplace the pH probe and log the replacement · replace the doser's internal tubing

25.1 Cleaning the chambers

  1. Empty the reservoirs completely under Configuration → Reservoirs → Empty.
  2. Open the lid and clean the inside of the chambers.
  3. Close it, run Fill and perform a full calibration (Chapter 10).

There is a video of the procedure at https://youtube.com/shorts/qm--dZ7LNUg

25.2 Memory card

The card holds the history, the event log and the interface files. When it fails, the symptoms are characteristic: graphs stop appearing, updates do not complete, or System Status shows SD: Not Detected.

The fix is to format or replace the card. Talk to support first — in many cases we can identify the cause remotely.

25.3 pH probe

  • Rinse only with distilled water; never wipe the bulb with cloth or paper.
  • Never let the probe dry out — more than 30 minutes in the air can damage it permanently.
  • Replace it every 12 months, or sooner if Probe Health falls below 55%.
  • Always log the change under Configuration → pH Probe → Log probe replacement.
CHAPTER 26

Troubleshooting

26.1 KH readings fluctuating

This is the most reported symptom, and it almost always has one of these causes. Work through them in order:

#CheckAction
1Aeration in both chambersSet the side valves for strong, equivalent airflow, with at least 5 mm of foam. If the air pump is weak, clean the air system or replace the pump
2Probe age and healthOver 12 months in use, or Health below 55%, replace the probe
3Chamber cleanlinessEmpty, open the lid, clean, refill and recalibrate
4Aquarium chemistryBorate, phosphate, silicate or organic matter above normal affect the measurement
5Stray voltage in the waterCheck for current leaking from aquarium equipment
6Lanthanum in useSuspend measurements during treatment and for 6 to 12 hours afterwards
7Hose positionMove it away from detritus, the skimmer and the dosing point
8Still fluctuatingContact support: we can assess the reading circuit's statistics remotely

26.2 Other symptoms

SymptomSolution
Software updates do not completeFormat or replace the memory card
Graphs do not appearFormat or replace the memory card
System Status shows SD: Not DetectedFormat or replace the memory card
Noise during aerationCheck the air pump's mounting — use silicone glue or double-sided tape
Noise from the dosing pumpsClean or replace the internal tubing
Traces of water in a dosing pumpReplace that pump's internal tubing immediately
Internal reservoir level lowUsually a consequence of power cuts during measurements. Empty completely, refill and recalibrate. If it persists, a level sensor may have a sealing fault — contact support
Equipment restarting on its ownCheck the power supply and the memory card
Trouble reaching it through the cloud or appCheck Wi-Fi signal quality and internet access under System → System Status → Network
Daily correction limit warning, alwaysNot a fault. Your main replenishment is undersized — increase the balling dose or the reactor rate (Chapter 16)
Co2 Port always at 100% and KH fallingThe reactor is not delivering: CO2 empty, media exhausted, valve blocked or too few bubbles (Chapter 17)
CHAPTER 27

Frequently asked questions

Do I need to calibrate the pH probe for the equipment to measure KH?

No. KH measurement works with the probe uncalibrated. Calibration is what lets the equipment display your aquarium's real pH. What matters for confidence in the measurement is Probe Health (Chapter 12).

How often should I compare against a chemical test?

Weekly for the first month, monthly after that. Remember your kit has a margin of error of about ± 0.30 dKH — differences of that size do not justify recalibrating.

Does measuring 24 times a day cost anything?

There is no reagent consumption and no cost per measurement. The only effect is normal wear on moving parts, which the maintenance routine in Chapter 25 already covers.

Does the Aquarino KH replace my balling or calcium reactor?

No. It makes small corrections and holds stability within the limits you set. Replacing daily consumption remains your main system's job.

Can I use it on a freshwater aquarium?

The Aquarino KH is designed and calibrated for marine aquariums. Its measurement method starts from the properties of saltwater.

What happens if the internet goes down?

Nothing essential. The equipment keeps measuring, correcting and recording normally. While the internet is out you can still reach it at its IP address from any browser on your network (Chapter 8). When the connection returns, the history syncs.

And if the power fails?

It resumes on its own when power returns. If the cut caught a measurement halfway, that sample is discarded for safety. Frequent cuts lower the internal level over time — in that case, run a full calibration.

Can I have more than one Aquarino on the same account?

Yes. The app lists every piece of equipment you have access to, whether yours or shared with you.

Why does my KH vary through the day?

Because the aquarium's consumption varies: with the lights on, photosynthesis and calcification increase. A gentle daily variation is normal and healthy. What matters is the trend across several days — and that is exactly what the graph reveals.

I changed a setting. Do I need to restart?

No. Settings take effect at the next measurement. A restart is only needed after changing the Wi-Fi network.

CHAPTER 28

Specifications

ItemSpecification
ApplicationMarine aquariums
Measured parameterAlkalinity (KH)
UnitsdKH, ppm CaCO3, mEq/L
MethodPatented, no reagents
Measurement frequency1 to 24 measurements per day
Cycle durationApproximately 30 minutes
Upward correctionExternal dosing pump through the KH Buffer port
Downward correctionCO2 solenoid or peristaltic pump control through the Co2 Port
Correction limitConfigurable; 1.00 dKH per 24-hour period by default
SensorpH probe with BNC connector, 12-month nominal service life
Integration outputsKH-OUT (BNC, emulates a pH interface) and Aquarino Controller integration
ConnectivityWi-Fi 2.4 GHz (802.11 b/g/n)
Access interfacesAquarino app (Android and iOS) and a local browser interface on your own network
NotificationsE-mail, sound alert and indicator LED
Data loggingHistory and events on a memory card, with spreadsheet export
UpdatesOver the network, with a notice in the interface
PowerUniversal-voltage 12 V / 5 A supply (included)
EnclosureAcrylic case
CHAPTER 29

Support and warranty

29.1 How to reach us

Whenever you need guidance or assistance, talk to us. We are here to help.

29.2 Warranty

Aquarino warrants that the Aquarino KH has passed rigorous quality testing and carries a 1-year warranty from the date of purchase, covering manufacturing defects and technical problems that compromise its proper operation.

Conditions

  1. The warranty follows the product: if you sell it before the term ends, the new owner has the same rights.
  2. The product must be used according to this manual and for its intended purpose.
  3. The warranty does not cover damage from misuse, drops, accidents, improper installation, unauthorised modification, use of parts or accessories that are not recommended, or problems arising from inadequate power supply or voltage variation.
  4. To claim the warranty, present the purchase invoice and describe the problem found.
  5. Repair or replacement takes up to 30 days from delivery of the product to the authorised service centre.
  6. If the product is under warranty and cannot be repaired, Aquarino reserves the right to replace it with a new one.

How to claim

Get in touch through any of the channels above, with your invoice at hand and a description of the problem. Our team will guide you through the next steps.

Thank you for choosing the Aquarino KH. Enjoy the hobby!