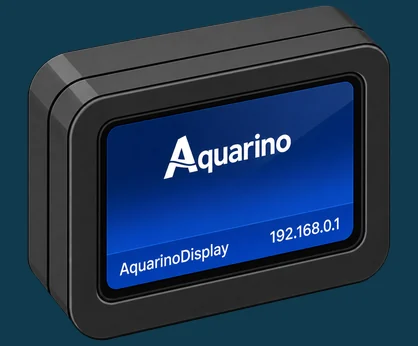
AQUARINO DISPLAY
The panel that shows your aquarium parameters in real time.
Preface
Like every aquarist, I looked for what was best for my fauna and flora; it took a lot of equipment, products and study.
After buying several devices to monitor, control and help me care for my aquarium, I realised that none of them met my needs perfectly. There was difficult setup, high cost and plenty of limitations.
So I decided to use my knowledge of technology, and my own resources, to offer our hobby a new option. That is the moment Aquarino was born.
I am very proud of what we have built. Many aquarists took an active part, sending suggestions. We only reached this result because you believed in the project.
What we want to keep as the essence of Aquarino is direct contact with aquarists, close support and service, and speed in delivering new features and products.
Join our channels to ask questions, send suggestions and talk about the hobby:
- WhatsApp: https://chat.whatsapp.com/IcFxySY8rgi3Inkenbbs3l
- Facebook: https://www.facebook.com/AquarinoController
- YouTube: https://www.youtube.com/c/aquarino
Aquarino depends on all of us to move forward and become a reference in usability, features and service for aquarists worldwide.
Thank you! We will repay your trust, and take our hobby to a new level.
Laercio M F Junior
Founder and Director of Innovation, Aquarino
How to use this manual
This manual is meant to be read in order the first time, and consulted by topic afterwards. If your Aquarino Display has just arrived, follow Part II in sequence — in a few minutes it will be showing your aquarium's parameters.
Four kinds of highlight appear throughout the text:
Getting to know your Aquarino Display
What the panel does, what is in the box and how the models differ.
What the Aquarino Display is
The Aquarino Display is the panel that keeps your aquarium's parameters in plain sight, in real time — no app to open, no phone to pick up. It connects to your Aquarino KH or Aquarino Controller over the network and shows, one by one, the sensors you chose to follow.
1.1 What it does
- Shows the parameters of your Aquarino equipment: current value, unit, minimum and maximum — one sensor at a time, in automatic rotation.
- Signals when a value is out of range: the colour changes and the panel tells you what is going on.
- Shows the health of the data: a stamp in the footer says how long ago the reading arrived — you know whether you are looking at the present or the past.
- Works over the local network or the cloud: at home, it reads the equipment directly; pairing by UUID works from any network.
- On the touch models, it sends commands: up to 4 configurable shortcut buttons — feed, dose, whatever you define.
1.2 What it does not do
- It does not measure anything. The Display is a mirror: the Aquarino KH or the Controller does the measuring. Without a source device, there is nothing to show.
- It does not control outlets or dosing pumps on its own — the shortcuts merely send commands to the source device, which decides what to do.
- It does not sound alerts. The warning is visual; it is the source device that beeps and sends e-mail.
In the box, and the parts
2.1 What comes in the box
- Aquarino Display;
- Dual-voltage 5 V / 1 A power supply with USB-C output.
2.2 The parts
| Part | Role |
|---|---|
| Case | PLA structure, printed for each screen model |
| LCD screen | Where everything happens — full colour, with the parameters in rotation |
| Physical button | Restarts the device |
| USB-C input | Power, from the supply that comes with the product |
The models
The Aquarino Display comes in three sizes. They all work the same way; what changes is the screen and whether it has touch:
| Model | Screen | Touch | On-screen settings |
|---|---|---|---|
| Display 1.47" | 1.47 inch | No | No — configured through the portal, in the browser |
| Display 3.5" | 3.5 inches | Yes | Yes — the gear on the screen opens the settings |
| Display 4.0" | 4.0 inches | Yes | Yes — the gear on the screen opens the settings |
On the touch models, you swipe to change sensors, open the settings through the gear and get the shortcut buttons (Chapter 10). On the compact, touchless 1.47" model, everything is configured through the portal in the browser (Chapter 11) — and the top bar shows the device's IP to make access easier.
Installation and pairing
Power it up, join your network and point it at the right device.
Installation
The physical installation is the easy part: the Display has no sensors, data cables or tubing — just the power supply.
- Choose a flat, dry surface with good visibility — the whole point of the Display is to sit where your eyes pass by.
- Connect the 5 V supply to the USB-C connector on the side and to the outlet.
- The screen lights up and shows the start-up sequence, step by step.
The first time, with no network configured, the Display creates its own setup network — the subject of the next chapter.
Connecting to your Wi-Fi network
If it cannot join a known network for about a minute, the Display opens its own Wi-Fi network and the screen guides you: "Set up over Wi-Fi — join the network and open 192.168.0.1".
- On your phone, open the Wi-Fi settings and connect to the network named on the screen — AquarinoDisplay from the factory. It is open, with no password and no internet; if the phone warns you, choose to stay connected.
- Open the browser and type http://192.168.0.1 — on many phones the portal opens by itself.
- On the portal's Wi-Fi tab, pick your network from the list, enter the password (at least 8 characters) and save.
- The Display restarts and joins your network. Done: the screen's bar now shows the Wi-Fi signal.
| Network requirement | Detail |
|---|---|
| 2.4 GHz only | Like the other Aquarino devices, the Display does not connect to 5 GHz networks |
| Reasonable signal | Networks with a very weak signal (below −75 dBm) do not appear in the portal's list |
| Password of 8+ characters | The portal does not accept shorter passwords — it is the WPA standard minimum |
Choosing the data source
With the Display on your network, all that is left is telling it where the data comes from: which Aquarino KH or Controller it should mirror. You do that on the portal's Data source tab — or, on the touch models, right on the screen.
6.1 The three ways to point
| Method | How it works |
|---|---|
| List of devices on the network | The Display searches for Aquarinos on your network and lists what it finds — just pick one. This is the normal path when everything is on the same network |
| Device IP | You type in the IP address of the KH or the Controller. Useful when automatic discovery does not find the device |
| Device UUID | You paste the unique identifier (from the label or from the device's System screen). Works from any network, because the link then goes through the cloud |
6.2 Local network or cloud?
The Display picks the best path on its own, always in this order: local network first — faster and independent of the internet — and cloud when it cannot reach the device directly. The LAN / CLOUD pill in the screen's bar shows which path is in use, and the portal shows the same state.
| Badge | Meaning |
|---|---|
| LAN | Reading the device directly, over your network — works even without internet |
| CLOUD | Reading through the Aquarino cloud — the path taken when the Display is on another network |
| No source | No device configured yet |
6.3 How many sensors, how often
- The Display follows up to 24 sensors from the source.
- The device is read every 1 minute from the factory — adjustable to 5, 15, 30 or 60 minutes in the portal.
- A sensor that goes 20 minutes without new data is considered stale: the value fades and the footer stamp warns you; if it stays silent, it leaves the rotation until it speaks again.
Day to day
Read the screen at a glance and make it your own.
Reading the screen
The Display's screen was designed to be read at a glance: what matters is big, and everything else tells the story of the data — where it came from, when it arrived and whether it deserves your trust.
7.1 The top bar
| Element | What it shows |
|---|---|
| Identification | The name of the source device — on the 1.47" model, the Display's IP, to make reaching the portal easier |
| LAN / CLOUD pill | Which path the data is arriving through (Chapter 6) |
| Signal bars | The quality of the Display's Wi-Fi |
| Pulsing dot | The panel's heartbeat: pulsing means the Display is alive and reading |
| Clock | The current time |
| Gear | On the touch models, opens the settings right on the screen |
7.2 The featured sensor
- Name of the sensor, as it is on the source device;
- Current value, with its unit;
- MIN and MAX, the recorded extremes — sensors without a range (level, leak) show
--; - The value changes colour when the source device flags the condition: blue below the range, amber above.
7.3 The footer stamp
The footer answers a panel's most important question: when is this data from?
| Stamp | Meaning |
|---|---|
| UPDATED X MIN AGO | Fresh data, arriving at the expected pace |
| NO READING YET | The sensor exists but has not delivered its first value yet |
| LAST UPDATE ... | The data has gone stale — the value also fades, so it never passes for current |
| OFFLINE | The data source is not responding |
Sensors and rotation
The Display shows one sensor at a time and cycles through the source's sensors on its own — the rotation. From the factory, each change happens every 5 seconds.
- The rotation interval is adjustable: 3, 5, 8 or 10 seconds through the on-screen settings (touch models), or from 2 to 600 seconds through the portal.
- On the touch models, swiping changes sensors instantly — and the automatic rotation pauses for a minute, so you can look at your leisure.
- In the portal, the Sensor rotation tab lets you hide sensors you do not want on the panel — they still exist on the device, they just leave the showcase.
Brightness, theme and night mode
A panel that is on 24 hours a day needs to know when to shine and when to disappear. All of this lives on the portal's Display tab — or behind the gear, on the touch models.
| Setting | Options |
|---|---|
| Brightness | From 30 to 100% — the 30% floor guarantees the screen never "goes dark" by mistake |
| Theme | Dark (default), light or neon |
| Language | Portuguese or English |
| Rotation | 0°, 90°, 180° or 270° — the Display works upright or on its side, either way around |
| Night mode | A window of visual silence: from 10 pm to 7 am (adjustable), brightness drops to the night level — or the screen turns off completely, if you prefer |
| Seconds per sensor | The rotation interval (Chapter 8) |
Command shortcuts
On the touch models (3.5" and 4.0"), the Display also acts: up to 4 shortcut buttons on the home screen, each firing a command at the source device.
- In the portal, open the Shortcuts tab.
- Give the button a name — for example,
Feed. - Enter the command — for example,
FeederStart()to trigger the Controller's feeder. - Enable the shortcut and save. The button appears on the Display's home screen.
Configuration and maintenance
The full portal and software updates.
The configuration portal
The portal is the Display's configuration hub, reachable from any browser on your network through the device's IP — the same address used during the first setup. It works at any time, not just during installation.
| Tab | What it configures |
|---|---|
| Wi-Fi | The Display's network (Chapter 5) |
| Data source | The mirrored device: network list, IP or UUID (Chapter 6) |
| Sensor rotation | Which sensors appear and how long each one stays (Chapter 8) |
| Display | Brightness, theme, language, rotation and night mode (Chapter 9) |
| Shortcuts | The command buttons — touch models only (Chapter 10) |
| System | Device name, e-mail, updates, restart and factory reset |
11.1 Device name
On the System tab you give the Display a name — up to 31 characters, no spaces. It is the name that appears in the Aquarino app and also the name of the setup network the device creates when it loses Wi-Fi. Name it with care: LivingRoomDisplay, SumpPanel.
11.2 Factory reset
The reset button, on the System tab, asks for confirmation and erases the Wi-Fi, data source and preferences — the UUID and the registration are preserved, so the device does not need to be registered again. On the touch models, the same reset is available in the on-screen settings.
Software updates
The Display checks for a new version on its own — at start-up and periodically afterwards — and installs the update for the correct screen model.
- During installation, the screen warns you: "Installing update. The screen goes dark for about a minute. Do not unplug." — and it means it: do not pull the plug.
- The update preserves all settings: network, data source, shortcuts and preferences stay exactly as they were.
- The update status appears on the portal's About card: up to date, version available, downloading, and so on.
Maintenance and support
Solutions to the most common problems, and how to reach us.
Troubleshooting
The Display's screen always tells you where it stands — start by reading the message, and the table below does the rest.
| What the screen shows | What to do |
|---|---|
| "Set up over Wi-Fi" with the name of a network | The Display is in setup mode. Connect to the named network and open 192.168.0.1 (Chapter 5) |
| "No Wi-Fi" with "connecting to..." or a retry countdown | The saved network is out of reach or the password changed. Wait out the retries or redo the setup |
| "Device not registered" with a code | Registration has not completed yet — check that the network has internet access. The code is the UUID, which support may ask for |
| "Data source" with the portal's IP | No device configured yet. Open the portal and point to the source (Chapter 6) |
| "Waiting for data" with "retrying LAN/CLOUD" | The source is configured but has not answered yet. Check that the source device is powered on and on the network |
| "OFFLINE" in the footer | The source stopped responding. Check the source device and the network |
| Faded value with "last update" | The data has gone stale (20 minutes with nothing new). Usually an unstable network or a busy source device |
| The opening bar stopped at a step | The step where it stopped is the diagnosis: network, registration or device. Fix the named item and restart |
| Screen dark in the middle of the night | It is night mode with "screen off" enabled (Chapter 9) — not a defect |
| A sensor vanished from the rotation | Either it stopped being a favourite on the source device, or it is hidden in the portal, or it went silent for more than 20 minutes |
If the problem persists, restart the device with the physical button — no settings are lost — and, if needed, contact support with the UUID at hand.
Frequently asked questions
Does the Display work without internet?
Yes, as long as it is on the same network as the source device — that is exactly what the LAN badge indicates. The internet is only needed for the initial registration, for UUID pairing across different networks and for updates.
Can I use the Display in another house, far from the aquarium?
Yes. Pair it using the UUID option (Chapter 6): the Display fetches the data through the cloud, from any network with internet access. A Display at the office showing the aquarium at home is a perfectly normal use.
How many Displays can I have?
Up to 5 Displays following the same device, and you can own as many units as you like — each pointing at whichever source you prefer.
How do I choose what appears on the panel?
On the source device: with the Controller, mark the sensors as favourites; the Display follows the stars. And in the Display's portal you can also hide sensors from the rotation (Chapter 8).
Does the Display measure anything?
No — it is a mirror. All measuring, calibration and alerting happens on the Aquarino KH or the Controller; the Display shows.
Why is the value faded?
Because the data has gone stale: more than 20 minutes without a new reading. The footer stamp shows when the last one was. It is the Display's way of never letting an old number pass for current.
Is the screen touch-enabled? Can I configure the Display itself?
On the 3.5" and 4.0" models, yes — swiping changes sensors and the gear opens the settings. The 1.47" model has no touch: everything is configured through the portal, in the browser.
Does updating erase my settings?
No. Updates preserve everything. Only the factory reset erases the settings — and even that preserves the device's registration.
Specifications
| Item | Specification |
|---|---|
| Function | Real-time display panel for Aquarino equipment |
| Models | 1.47" (no touch) · 3.5" and 4.0" (touch) |
| Data sources | Aquarino KH and Aquarino Controller — over the local network or the cloud |
| Pairing | Automatic network discovery, IP or UUID (works from any network) |
| Sensors followed | Up to 24 per unit; up to 5 Displays per device |
| Source polling | Every 1 minute (adjustable: 5, 15, 30 or 60 min) |
| Rotation | 5 s per sensor from the factory (adjustable from 2 to 600 s) |
| Screen settings | Brightness 30–100%, dark/light/neon themes, rotation 0/90/180/270°, programmable night mode |
| Languages | Portuguese and English |
| Shortcuts | Up to 4 command buttons (touch models) |
| Connectivity | 2.4 GHz Wi-Fi |
| Configuration | Browser portal (all models) and on-screen settings (touch models) |
| Updates | Automatic over the internet, preserving the settings |
| Power | Dual-voltage 5 V / 1 A supply, USB-C connector (included) |
| Structure | PLA printed case |
Support and warranty
16.1 Support channels
Whenever you need guidance or assistance, talk to us. We are here to help.
| Channel | Address |
|---|---|
| aquarinocontroller@gmail.com | |
| WhatsApp — user group | https://chat.whatsapp.com/IcFxySY8rgi3Inkenbbs3l |
| Website | https://www.aquarino.com.br/ |
| YouTube | https://www.youtube.com/c/aquarino |
| https://www.facebook.com/AquarinoController |
16.2 Warranty
Aquarino guarantees that the Aquarino Display product has undergone rigorous quality testing and carries a 1-year warranty from the date of purchase, covering manufacturing defects and technical problems that compromise its proper operation.
Conditions
- The warranty follows the product: if you sell it before the period ends, the new owner is entitled to the same conditions.
- The product must be used according to the instructions in this manual and for its intended purposes.
- The warranty does not cover damage from misuse, drops, accidents, improper installation, unauthorised modifications, use of non-recommended parts or accessories, or problems arising from inadequate electrical supply or voltage variations.
- To make a warranty claim, present the purchase invoice and describe the problem found.
- The deadline for repair or replacement is up to 30 days, counted from delivery of the product to the authorised service centre.
- If the product is under warranty and cannot be repaired, Aquarino reserves the right to replace it with a new product.
How to make a warranty claim
Get in touch through any of the channels above, with the invoice at hand and a description of the problem. Our team will guide you through the next steps.
Thank you for choosing the Aquarino Display. Happy reefing!